
- Internet: Medium For Communication, Medium For Narrative Control
- Part 5 — Adapting
- Section 2 — Legality, Transparency, Accountability, The Nations Intervene
Table Of Content
- Introduction
- Part 1: The Artifacts And Spaces
In this part we'll describe the important artifacts and places. Going
over these essential, but basic, pieces is mandatory to understand how
they come into play as tools.
- Part 2: The Actors and Incentives
In this part we'll go over how the previous elements are put into work
by the different actors, who these actors are, what are their incentives,
and the new dynamics.
- Part 3: Biases & Self
In this part we'll try to understand why we are prone to manipulation,
why they work so effectively or not on us, and who is subject to them.
- Part 4: The Big Picture
In this part we'll put forward the reasons why we should care about
what is happening in the online sphere. Why it's important to pay
attention to it and the effects it could have at the scale of societies,
and individuals. This part will attempt to give the bigger picture of
the situation.
- Part 5: Adapting
In this concluding part we'll go over the multiple solutions that have
been proposed or tried to counter the negative aspects of the internet.
- Conclusion & Bibliography
- Laws and Governments as Moral Arbiters
- Free Market Competition Is Not Enough, Privacy as a Human Right
- Balance Between Sociality And Privacy
- Consent, Ownership
- Consent, Persuasive Tech
- Consent, Right Of Non-Reception
- Accountability, Securing Data
- Accountability, Content + Gatekeeping
- Transparency, Processing, Usage, Analytics, and Partnerships
- Transparency, Disclosing Sponsors
- Transparency, Bots
- Example Laws
- Drawback Of GDPR
- Standardization Of Data
- Privacy as a Utility, Government Monopoly on Identity
- Social Media as a Utility
- Digital Identity, Identity as a Public Infrastructure
- Examples of Implementations
The market and corporate self-regulation have their limits. They cannot
in themselves be sources of morals and ethics. This is the realm of laws,
the legislations that governments make are the real arbiters of duties
and rights.
The governments, as state entities, can impose the rules that should be
followed to be able to act on their territories. However, laws are bound
by geographical areas and as such cannot be international. They can only
be inter-governmental if treaties and partnerships are in place. Companies
can decide to comply to different regulations in different areas to be
able to operate on these markets.
The best defensive tactic for nations is always legislations, instead
of leaving it as a free-for-all medley. This is what we’ll dive into:
when governments intervene on the internet.
The neoliberal mindset abhors this return to authorities because of the
general lack of truth we’ve seen earlier. Yet, who do we trust more
and want to grant more authority to: private for-profit entities on
not-so-free markets or our governments and their legal systems?
In this section we’ll focus on rights and not regulations related to the
private sector. Things related to transparency, accountability, consent,
ownership, utility, and identity.
We’ve already seen market regulations for fair competition, conflicts of
interests, collusions, antitrust, and others that are currently discussed
or getting in place around the world.
Despite these new market regulations, many of the internet giants and
their partners still stand tall and confident that their business model
isn’t going to fall. Either because of nifty bypassing techniques, or
because of lobbying. That’s why such regulations don’t coincide with
what most of the netizens actually want.
For example, many recognize and want privacy to be a basic human right,
part of human dignity. The “right to be let alone”.
Similarly, we’ve previously seen how researchers and human right
activists are now thinking, when it comes to brain data privacy, of new
rights such as: cognitive liberty, mental privacy, mental integrity,
and psychological continuity.
On the surface, these will only be fancy words of wisdom and
considerations if they aren’t written in laws, legally binding. Otherwise,
companies could lie. Governments have to ensure the spirit of the laws
are applied and not mere market regulations. It would be catastrophic
if no such basic rights are in place and sensitive personal information
such as brain data become common place on the internet.
The question today are related to who’s in charge of the privacy and what
kind of balance we can have. Can our information be both a currency for
some and protected as a right for others?
The actual implementation is a hard problem when it comes to privacy
guidelines as there is a balance between sociality and privacy: sociality
has always required the voluntary abandonment of privacy. In order to be
social we must give up some of our private time and space to share it
with others.
This takes new forms online where sociality is taken at the expense
of privacy and social autonomy. Today, it rests mostly upon digital
records and archives in the hands of private companies that track our
social behavior. As we’ll see, it could be more attractive to have these
records switch hands from the corporate world to the public sector.
The legal world is a tricky one, the laws need to be written so that
they cannot be abused, covering as many aspects of an issue as possible
to not leave room for ambiguity.
The first clarification that needs to be made is about defining what
is meant by personal data and who is the actual owner of such data. We
already gave our definition in the data and personal data section in
part 1 of this series.
Personal data is any information that can be used to directly or
indirectly identify a person, an attribute currently attached to them,
a behavior, a preference or interest, personal history, anything.
These include things such as name, phone number, address, email,
schoolbook, credit scores, geolocation, travel logs, interests,
information about past purchases, health records, insurance records,
online behavior, etc..
We call the person to which the personal data belongs a data subject.
Having this definition in a text law is the starting point.
Then, comes the issue of ownership of the data. As you might remember,
we called the person which data was extracted from the data subjects.
Hence, we need to specify what are the rights of ownership they have
over their data, and in which cases they need to give consent to allow
others to access it.
The consent itself needs to be delineated properly. We need to know what
can be done with the data, for what purpose, for how long the retention
can be, and most importantly, if consent is transferable. One company
getting approval to access data could share this data with other entities,
the transitive consent and transitive propagation of data.
Ownership also rhymes with control. Laws might want to spell out if
a data subject should or should not be able to perform corrections,
updates, or erasures of the data they have generated.
Yet, consent makes no sense if people can be coerced into giving it, if it
isn’t informed consent. This is the case online with the use of persuasive
technology, both to extract data and be subject to advertisements. They go
hand in hand. Thus, the legal domain has to take this into consideration
and posit whether such technology is allowed or not.
Additionally, it could make the parallel with gambling, alcohol,
cigarettes, or other questionable products, basically limiting
advertisements on mainstream channels.
Furthermore, when it comes to consent, the law has to deliberate if
persuasive algorithms and designs should be allowed on children or not
— age is often a factor when it comes to consent. Persuasive design
and dark patterns could be made illegal altogether.
When it comes to advertisements, it has to be decided if consent needs to
be given even before receiving them, or whether the person can at a later
time refuse to receive them, retracting it.
The right of non-reception, is the right of someone not wanting to be the
recipient of ads. If such right is in place, companies could be pursued
in court and fined if they advertise to people who have opted-out of them,
or to those who haven’t opted-in depending on how the law is phrased.
Such right is generally associated with online cookies, the right to
not be traced online.
Offline, it is associated with not receiving ads in mailboxes, or at
city-scale, to not have or limit billboards. This is also a method to
avoid material waste.
Still, these can easily be bypassed with an ingenuous use of product
placement and sponsoring instead of direct ads. Or even turning customers
into brand evangelists, which is the norm with neoliberalism as we’ve
seen earlier.
Once the personal data is stored, it could and is expected to be subject
to access restriction and accountability. The companies and entities
we have trusted with our data should be responsible for their safety so
that nobody else retrieves them.
Thus, governments could create bodies and processes to verify the
security, integrity, and confidentiality of the data storage in companies
and entities that choose to host it. With the increase in quantity
and types of consumer data, it is imperative to have such measures in
place. We’ve heard too many data leaks stories in the news lately,
either from hacking or rogue employees.
Arguably, even standards like the PCI-DSS, if applied to personal data,
might not be enough without real-time checks.
Along with the responsibility of storing the data, laws could dive into
the accountability related to the content of the data itself. Should
platforms be accountable for the content it hosts, or should it be the
data subjects themselves, or both?
This would in turn create new gatekeepers: a monitoring and reviewing of
the content published and hosted. This could also include the algorithms
that are used to promote content.
These algorithms have acted as amplifiers of extremism, enlarging
dangerous fringe communities, and pushing biases (racial or
others). Currently, the entities that are using them have been hiding
behind the fact that these are algorithms, and thus “mathwashed”
removing their responsibility because “they have no conscience of their
own”. The myth of the impartial machine.
Many of the social network platforms, in the USA, have been avoiding
monitoring the content posted on them by referring to the USA first
amendment of free speech and the 1996 USA Communications Decency Act,
shielding them from liability for content posted by their users.
However, this only applies to the USA and the different branches of the
same platforms are able to monitor content in other countries.
To thwart this, governments need to either consider social media as news
platforms, or find methods to strengthen the institutions that create and
distribute reliable information: mainstream media, academia, nonpartisan
government agencies, etc..
Once social media are part of the mainstream news system, the gatekeepers
are back in place, they’ll have to uphold journalism standards for the
content posted on them.
Governments can also enforce social networks to pay news that get
published and distributed there, indirectly re-strengthening the local
media publishers.
Apart from news, the platforms can be held liable for the undesirable
content that is shared there.
This is most important when this content is shared in a public space
that children can access. Laws can ensure children won’t be subject
to neither surveillance, tracking, and be protected from predatory and
dangerous content.
Contrary to popular belief, in the USA the COPPA (Children’s Online
Privacy Protection Act) only takes the advertisement and tracking of
children, but not whether the platforms are responsible for the content
to which they are subject to. The Child Online Protection Act of 1998
(COPA, yes similar name) is the one that has the intent of preventing
minors from accessing obscene material on commercial websites in the USA.
Most countries already protect their children against being subject to
harmful material on public commercial channels.
India’s new intermediary liability and digital media regulations takes
a step further and forces content to be traceable to its source, to be
able to verify social media users, and rapidly take down non-consensual
sexually explicit content and morphed/impersonated content within 24h
of being notified.
With the same mindset, some countries have laws specifically to take
down online hate speech and incitations of violence or terrorism.
If we can’t blame the hosts of the content, we might want to hold
the people that generated it accountable. This, in turn, should make
black propaganda ineffective. However, because most online-interactions are
anonymous, it is very hard to do.
A solution to this would be to attach a real identity to whoever uses,
posts, and creates online content, this is what the concept of digital
identity is about.
Online platforms that allow bots could also be forced to tag them as such,
making it clear to everyone that these aren’t real humans.
We’ll discuss this later, but as you can expect, while it does bring
back gatekeepers, it also could create more social cooling.
Agreeing that the personal data should only be used for specific purposes
is fine, but there needs to be some guarantee behind the agreement. For
trust to set in, transparency is mandatory.
One type of transparency is about understanding why and how the
recommendation engines, the curation systems of the internet, work. From
advertisements, to news feeds and other algorithms. Having a clear
picture of their inner-workings would help us make better decisions and
responsibilities instead of overly relying and trusting them.
With the recommendation engines come the analytics, the categorizing,
ranking, rating, and scoring of data: how data is processed
internally. Transparency is about knowing where and how our data will
be used, in what process.
It could be hard for companies to accept transparency at this level
because that would mean opening their valuable extracted data storage
to the world.
The transitive propagation of data needs also to be transparent if it
happens. That includes disclosing who are the third parties that will
access the data, for which reasons, what data points they used, the
target audience, and who paid for the ads campaigns.
This type of financial accountability, full transparency regarding the
amount spent by companies on ads, also applies to political campaigns
sponsorship. Ad political campaigns, which on the internet were often
overlooked, would now have their layer of anonymity removed. Yet again
removing black propaganda and state-linked accounts from the equation
and making microtargeting less obvious.
Many legislatures, regions, states, governments, authorities, and
countries have erected or proposed laws to tackle the things we’ve seen,
let’s mention some of them.
Related to the financial accountability, the Honest Ads Act, is a bill
in the USA that was proposed such that online services would be required
to reveal the description of the target audience of ads campaigns.
However, this bill wasn’t passed yet in favor of self-regulation. The
USA, in general, is a laggard on the domain of privacy as it feels more
threatened by the intervention of the state than the market.
Still, in 2018, the California Consumer Privacy Protection, a legislature
passed in California (a USA state) would guarantee users in that region
the right to know what data is being collected, and opting out of the
sale of their data.
This opt-out approach isn’t the best but it’s a start.
Others might find that there needs to be a stronger data protection,
that it’s part of human dignity and that it shouldn’t be threatened by
any kind of intrusions. In that view, privacy and ownership over our
private data is a default and not an opt-out.
The European Union was the first in 2016 to spear-head this change by
rolling out the largest attempt at protecting user data with the General
Data Protection Regulation.
Privacy laws are not new, for example France’s data protection law dates
back to 1978, and the EU already had Data Protection Directive law
about the protection of fundamental rights and freedoms in the processing
of personal data, dating from 1995. However, the GDPR is an extension of
all this with modernization, clarification, and making it actionable. It
is a move that has spurred other states to enforce similar laws. It also
gives them more confidence in intervening against the internet behemoths,
which they wouldn’t dare attack before.
The French data protection law ensures the following rights:
Personal data must be collected and processed fairly and lawfully for
specified, explicit, and legitimate purposes, and with the consent of
the data subject. In addition to the right to consent, data subjects have
been given the following rights: right to be informed, right to object,
right of access, right to correct and delete information, and right to
be forgotten.
These have been mapped unto GDPR to hold data processors accountable
when manipulating data that isn’t mandatory for the functioning of the
service. It defines clearly what is meant by personal data, what it means
to process it, and what is required of organizations and entities that
process it.
The organizations are expected to have a management procedure in place
to keep the data safe and secure from breach. That means specific
roles need to be in place, such as a Data Protection Officer, and the
risk management assured. They are held accountable for the privacy and
protection of the data, and data protection assessment can be performed to
ensure this is properly applied.
The data subjects keep their rights over their data. They should be
informed about the processing activities taking place, the data not being
used for any non-legitimate purpose. Their explicit consent needs to be
requested for its usage and collection. That means the data subjects
have the right to update/correct and erase their data. Additionally,
the data subject can ask to see which data is held about them and control
whether its transfer can happen between third parties or not.
Most importantly, regulators can ask for demonstrations of accountability
and impose fines for the entities that aren’t complying. This is the
clause that makes the difference with any previous laws.
After it was passed, the internet has been shaken. Most websites have
chosen to display annoying pop-ups/notification banners asking if users
want to allow their information to be shared with third parties. It
defaults to no but it is sometimes hard to manipulate and very intrusive.
Moreover, some companies are also allowing their users residing in
the EU to download the personal data that has been gathered, and give
them the possibility to delist it, essentially erasing it.
The way the GDPR has been applied by companies has given rise to more dark
patterns, persuasive technologies trying to trick users into accepting
to give their personal info.
Research has shown that only around 11.8% of consent forms in 2019 met
the minimal requirements based on the European law.
Multiple countries have their own privacy laws and acts, and many today
are modernizing and reforming them to add actionability like GDPR.
Some even include the right to data portability and the right to object
to marketing, the right of non-reception which we mentioned earlier.
Let’s take some examples.
Canada has the Privacy Act from 1983, which it is modernizing to be
similar to the GDPR in the Personal Information Protection and Electronic
Data Act. China’s Personal Information Security Specification that
took effect in 2018, and ratified in 2020 in the Personal Information
Protection Law, has more strenuous and far-reaching requirements than GDPR
applying to any personal data and not only sensitive personal data. The
UK has its UK Data Protection Act from 1998, which has been updated in
2018 to follow and supplement the GDPR, and is being updated today to
follow its own standards. The Irish Data Protection Commissioner (DPC)
upholds the same fundamental privacy standards as the EU. Similarly,
Australia has updated its 1988 Privacy Act and Australian Privacy
Principles to be like the GDPR. Russia Federal Law on Personal Data of
2006 regulates data processors to protect the defined sensitive personal
data against unlawful and accidental access. India’s PDP Bill of 2019
goes in the same direction as GDPR but is more integrated with Aadhaar
portability which we’ll see in a bit. Argentina is going the same way,
currently amending their laws to be like the GDPR. etc..
It’s apparent that most of the world is moving in the direction of
edifying laws to protect the privacy of the citizen from the private
corporate data brokers. Market regulations aren’t seen as enough.
Some nations take it a step further, considering the protection, privacy,
standardization, digitalization, and usage of identity to be the role
of the state and not corporations. The state should have a monopoly on
identity, just like it should, in theory, have a monopoly on violence
because it has the same destructive power.
As we said, sociality requires giving up a bit of privacy, and
the digitalization of identity is a requirement for the information
society. Some people are uncomfortable with the idea of making it the
job of the state and would rather have centralized private entities do
that. Yet we know that corporate incentives are only for-profit and not
the shared good, which could hinder the transformation of the society
into this new era.
Thus, some governments force the private sector to strictly follow
their privacy rules, while the public sector uses identity as a utility,
a part of public infrastructure for the public services.
This requires standardization, definition, transparency, and data
portability of digital identity. We’ll come back to this in a bit but
first let’s imagine social media as one of these services.
We already discussed social media as utilities in the social media
section of part 1. We said back then that for it to be a utility,
it should change from a want to a need, an essential infrastructure,
a necessity like electricity.
Social media could be said to be an integral part of information society,
in order to adequately take part in the 21st century as an individual,
and thus would be important to have the government provide it to remove
any profit incentives from it.
Some believe that current popular social media already act, feel, and
are considered by people like utilities. So they push forward the idea
of making them as such, just like the telecom sector or electricity
sector: a public service that is regulated by the government.
It would make it easier to ensure the protection of the
constitutional rights of users, such as freedom of speech in some
countries. Additionally, the government could enforce search neutrality,
modeled after net neutrality regulations — essentially assure equal
access for everyone.
Yet, others argue that making social media similar to telecom regulations
would be bad for the market, reduce innovation and growth because of
the lack of competition. This is a market view of the subject.
Moreover, it can be said that social media haven’t gained the status
of utility because countries don’t go haywire when they go down, that
there is always an alternative, they are still new and replaced every
couple of years.
Furthermore, from the neoliberal perspective, one that dreads authorities
and prefers seeing things as a free flowing market, not catching nuances,
this is the equivalent of the chilling rise of “authoritarianism”
and “fascism”. Words that are used as emphasis to display the attack
they feel towards their world view.
Still, there might indeed be a new kind of social cooling taking place
when we become owners of our social media, instead of having them
as private companies. State actors were already requesting personal
data from these companies and using them for their gain, as we’ve seen
before. Making them public utilities would instead force the general
public to keep it in check, as it would be something they would be
indirectly paying to keep running.
Another trend is the one of the digitalization of identity by
governments. This is the standardization of identification and identity
systems and management that become part of the public infrastructure.
In practice, this is more of a re-definition of national identity cards by
making them digital, interoperable, and accessible by all citizens. Having
it as an infrastructure means that all kinds of public and private
services can rely on it to verify reliably the identity of people.
This comes with a lot of challenges for governments as they have to
set in place the legal framework around the infrastructure, its usage,
regulations, auditability, traceability, transparency, and obviously
actually create a technology that is secure, confidential, keeps the
integrity, is scalable, and respectful of all individuals.
The capability of the identity system needs to be well-defined, from
authentication, authorization, roles, and delegations available. Some
government bodies and international standards have been created for
these identity management systems such as ISO, the EU eIDAS, European
Self-Sovereign Identity Framework, European Blockchain Services
Infrastructure (EBSI), and the GSMA Identity programme and Mobile Connect.
Like with social media as a utility, this comes with the same perception
from those who’d rather be surveilled by private companies than their
government. But with enough transparency and preparation, the most
digitally-skeptic can get on board, especially if the solutions are free
and open source as we’ll see in the next section.
So far, the implementations of digital identities by governments have only
been applied when it comes to accessing public services and KYC processes
when signing up for services such as telcos, energy, and banks.
Estonia, India, and China are countries that are leading the way. The
upside is convenience and an economic boost. According to McKinsey Global
Institute, countries that implement a digital ID scheme can boost their
gross domestic product by 3 to 13 percent by 2030.
Estonia has been rolling its digital identity program for the past
20 years. Technically, it is a mandatory 11-digit unique identifier
assigned to all citizens above the age of 15 that is stored along with
a public-private key pair in a PKI (Public-Key Infrastructure).
The default format of this digital ID is a physical card, an i-card,
similar to a credit card, passports, and sim cards: an embedded chip
(UICC) protected by PIN codes. Internally these circuit cards use secure
elements (SE) as a root of trust to store the sensitive information. We
generally refer to this type of technology as hardware security modules
(HSM). Other formats exist such as a mobile application that inspired
China’s version of it, I am not currently aware if the Chinese solution
additionally requires an UICC to be inserted in the phones.
The data is stored in a decentralized blockchain that is scalable and
secure. Protected against cyber threats, which they’ve been subject to
in the past, and are obviously continuously facing and tackling newer
security challenges. Additionally, the data is also backed up in Estonia’s
e-embassy in Luxembourg.
Practically, this allows someone to be verified during a KYC process
(Know Your Customer), login to private or public services, to encrypt
or decrypt files securely, and to legally digitally sign documents.
Note that e-signatures are allowed in the EU, through the eSignature
Directive, to replace handwritten ones.
Users of such system are thus in the center, practicing self-sovereign
identity (SSI), personal autonomy, in full control of who has access to
their data. The system allows for traceability and auditability. Citizens
can transparently see what data is collected about them, when, why,
who has accessed to them, revoke or keep this information, and more. That
is unless law enforcement requests access, but they’ll still be notified
once the investigation wraps up.
This can be abused but the country has shown a strong legal stance
whenever law enforcement or doctors took advantage of their
positions. The traceability of each access also makes it harder for
someone to touch the data without anyone else noticing — unlike
traditional physical cabinet storages. This enables more privacy and
empowerment that when a private company has control over personal data.
The advantages are obvious: designers of systems save time by relying
on the government infrastructure, and citizens too by carrying their
life activities online.
This includes banking, e-residency, accessing health records, medical
prescriptions, voting, paying taxes, and more. One thing they are
considering integrating is their own cryptocurrency.
Estonia also teaches cyber hygiene in elementary school. Education is
an important factor that we’ll dive into next.
The EU is considering implementing a similar system, but leaving each
national authority the choice. However, it is still being discussed and
argued if it should be mandated across all nations. They have agreed
on eSignature Directive, allowing electronic signatures to be the
equivalent of handwritten ones, and took a few steps with encouraging
national digital IDs in 2018 through the Electronic Identification And
Trust Services (eIDAS) regulation. The implementation of digital ID in
Europe would allow cross-border electronic transactions and electronic
signatures, but only 14 out of 27 member countries have introduced online
authentication systems, such as DigiD in the Netherlands, Belgium’s eID
card, and Spain’s DNIe.
Another large implementation of digital identity is India’s
Aadhaar. Technically, it is a non-compulsory 12-digit unique identifier,
termed Aadhaar, that also comes with a public-private key infrastructure
that stores biometric information.
Due to the non-mandatory nature, the government has to ensure that no
service can be denied if the person hasn’t signed up for Aadhaar. However,
in practice, many services are now using it for KYC as a replacement
for paper proof of identification.
Moreover, because it isn’t mandatory, Aadhaar isn’t a proof of
citizenship or residence: it doesn’t replace other IDs like passports
or driver’s licenses.
Aadhar practical form is as a biometric ID system, allowing citizens
to prove their identity by simply providing a fingerprint or iris scan
for example. There is also an ID card that can be issued.
On top of Aadhar, the government has rolled out a Unified Payment
Interface (UPI) allowing banks to interoperate with Aadhaar. UPI is
designed to make person-to-person (p2p) and e-commerce transactions swifter
and easier.
For India, this has been a game changer, enabling access to bank
accounts and services that most couldn’t access before, making them
more inclusive. Figures are not robust, but it can be assured that most
(4 out of 5) Indian citizens have the ID card.
This saves a lot of overhead, someone can transfer money simply by
showing their Aadhaar card, or paying with their fingerprint.
Unfortunately, there are a lot of criticism, calling it a
“tech-solutionism” and saying the roll-out has been discriminatory.
Besides, there have been emerging reports regarding the security concerns
of the personal data associated with Aadhaar ID being sold in alternate
markets.
These flaws in privacy and security need to be addressed with
accountability, traceability, and a strong legal framework, similar to
what Estonia is doing. So far, Aadhaar doesn’t yet seem to put the person
in control of their own information, self-sovereign identity. Plus, the
document could be upgraded to be considered a true proof of citizenship.
Additionally, only basic biometrics is not enough, but adding a smart
card with a pin to the mix was the way to go. It fulfills: something
you know, something you have, something you are.
The development possibilities are there and the outcomes would be
interesting.
China has slowly been pushing for its virtual/electronic ID card,
a digital ID. Practically, it is a valid national ID that contains
biometric information such as face and fingerprints.
The solution takes a mobile-first approach, as an app with QR codes,
and would integrate well with all services, both online and offline. It
is still in its pilot/trial phase, but would be a true replacement for
official ID cards and could be used within popular applications such
as WeChat and Alipay. For example, WeChat Payment is already extremely
popular for making digital payments.
China’s implementation would be directly inspired by Estonia’s one, very
similar. At China’s scale, like India, it would open a lot of future
possibilities as 67 percent of Chinese residents do not currently have
a credit record. The system would also be linked to a generic credit
score database.
China is also eyeing entering the digitalization of the supply
chain. Their Standardization Administration describes it neatly:
“First-class companies do standards. Second-tier companies do
technology. Third-tier companies do products.”
This means being able to associate identity and traceability of all
the supply chain and trade processes across multiple geographies and
organizations. A true verifiable life-cycle where you could identify
compliance and transparency.
For that, they’ve partnered with international standard organizations
such as ISO and ITU, and started designing and implementing the next
wave of standardization in cyber-physical trade with its ambitious
China 2035 Standards strategy. This initiative is also driven by other
organizations such as UN/CEFACT, the ICC, World Customs Organization,
the European Union Intellectual Property Office (EUIPO), and International
Air Transport Association (IATA).
This type of digital meta-platform, this platform-of-plaforms, would
empower individual actors by giving them the power of traceability and
identity for supply chain & trade. This applies to both people within
it and outside it.
For the consumer, that would mean being able to reliably see the
origin of a product, including its materials, legal, geographical,
intellectual-property, its origins, and more. This is essential for many
of us, and would make it easy to see the quality of intangible goods.
Consumers, governments, and companies are demanding details about the
systems, enterprises, and sources that delivered and transformed the
goods along their value chain. They worry most about quality, safety,
ethics, and environmental impact, to name just a few.
This would ensure the transparency when buying products from big platforms
that contain sub-markets such as Alibaba, Amazon, and Wal-Mart. This
adds a lot of trust and transparency with consumers, they can verify the
digital twin of their physical good, along with its history.
Now, that is going digital!
A path towards societal digitalization through internet technologies.
Other countries such as Argentina, Afghanistan, Denmark, Pakistan,
Kazakhstan, and more have or are introducing national ID cards with
embedded chips used for services and are considering or in the progress
of integrating with biometrics, payment, and the online world just like
Estonia, India, and China are doing.
This seems like a global trend and is expected to increase with new
types of root of trust that can be shared over the wire such as IoT SAFE.
This concludes our review of how governments can bring back order, morals,
and ethics on the internet. In a first place, we’ve dabbled with how the
market isn’t enough and how there’s a need for laws that
would consider privacy as a human rights. Then we’ve seen the balance
between sociality and privacy, to whom we’d prefer giving it. Next we
went over three topics applied to legality: consent, accountability,
and transparency. After that we’ve looked at some examples, how the
world is moving in that direction. Finally, we’ve tackled identity and
social media as utilities and infrastructures, and what that would imply,
along with some of today’s examples.
Table Of Content
- Introduction
- Part 1: The Artifacts And Spaces
In this part we'll describe the important artifacts and places. Going
over these essential, but basic, pieces is mandatory to understand how
they come into play as tools.
- Part 2: The Actors and Incentives
In this part we'll go over how the previous elements are put into work
by the different actors, who these actors are, what are their incentives,
and the new dynamics.
- Part 3: Biases & Self
In this part we'll try to understand why we are prone to manipulation,
why they work so effectively or not on us, and who is subject to them.
- Part 4: The Big Picture
In this part we'll put forward the reasons why we should care about
what is happening in the online sphere. Why it's important to pay
attention to it and the effects it could have at the scale of societies,
and individuals. This part will attempt to give the bigger picture of
the situation.
- Part 5: Adapting
In this concluding part we'll go over the multiple solutions that have
been proposed or tried to counter the negative aspects of the internet.
- Conclusion & Bibliography
References
- Algorithms, bots, and political communication in the US 2016 election: The challenge of automated political communication for election law and administration
- The Tech Industry’s War on Kids
- STATE-SPONSORED TROLLING How Governments Are Deploying Disinformation as Part of Broader Digital Harassment Campaigns
- Platforms Must Pay for Their Role in the Insurrection
- Dark Pattern (Wikipedia)
- Just Don’t Call It Privacy
- ‘Weaponized Ad Technology’: Facebook’s Moneymaker Gets a Critical Eye
- New human rights to protect against ‘mind hacking’ and brain data theft proposed
- What’s Going on With France’s Online Hate Speech Law?
- Liberté de réception
- GDPR
- Personal Data Protection Bill, 2019
- Data Protection Act 2018
- Australia Passes Law Making Facebook, Google Pay for News
- Google says it’s confident about alternatives to browser cookies that track you for ads
- Lack of competition in ad tech affecting publishers, advertisers and consumers
- Percolation Theory
- On the Origins of Memes by Means of Fringe Web Communities
- Democracy of the Gullible 2020 DW Documentary
- What is Social Cooling?
- The world’s most valuable resource is no longer oil, but data
- Social media as a utility
- Public Money, Public Code
- Towards a more sustainable single market for business and consumers
- Minister hints at UK departure from GDPR
- Facebook’s GDPR consent bypass via a “contractual advertisement duty” before Austrian Supreme Court, with high potential for a reference to the CJEU
- What’s Data Privacy Law In Your Country?
- Requests to delist content under European privacy law
- Find Out Where Apple, Facebook, Google, Twitter and Other Tech Giants Are Sending Your Data
- We can have democracy or we can have Facebook, but we can’t have both
- Who runs the world… Big Tech?
- Dark Patterns after the GDPR: Scraping Consent Pop-ups and Demonstrating their Influence
- How Neoliberal Policy Shaped the Internet—and What to Do About It Now
- Silicon Valley’s POWER GRAB - Can Big Tech Be Broken Up?
- Social media as a public utility
- U.S. Supreme Court rebuffs Facebook appeal in user tracking lawsuit
- No Gates, No Keepers — The technology industry is hurt at every level by toxic gatekeeping
- Gatekeeping in Online Communities
- You Can’t Censor Away Extremism (or Any Other Problem)
- Digital Identity in China: Today & Tomorrow
- Identity in a Multi-polar World and China’s 2035 Standards
- Is China The Roadmap — Or Red Flag — For Digital ID Verification?
- Nuances Of Aadhaar: India’s Digital Identity, Identification System And ID
- Inside Aadhaar, India’s massive digital identity program
- A Practical Guide to Data Privacy Laws by Country
- India’s billion digital identities
- Digital Identity: Towards Shared Principles for Public and Private Sector Cooperation
- Is India’s digital ID system, Aadhaar, a tech solution for a socio-economic problem?
- Privacy Act (Canada)
- What is China’s Social Credit System and What Does it Mean for Online Identity?
- Modernizing Canada’s Privacy Act
- HBR, 2010, The Transparent Supply Chain
- New China Data Privacy Standard Looks More Far-Reaching than GDPR
- Are We Automating Racism?
- HOW WILL WECHAT ELECTRONIC ID SYSTEM WORK?
- India’s new intermediary liability and digital media regulations will harm the open internet
- Racial Discrimination in Face Recognition Technology
- Online Privacy Law: France
- 533 million Facebook users’ phone numbers and personal data have been leaked online
- DigiD
- Identity management
- Self-sovereign identity
- Time to regulate AI that interprets human emotions
- Data Protection Commissioner (DPC)
- Digital Identity
- Electronic identification
- Honest Ads Act — USA
- How Estonia is Pioneering the Digital Identity Space
- GSMA Identity programme
- Google misled consumers about the collection and use of location data
- Estonian Electronic Identity Card and Its Security Challenges
- Booking.com fined €475,000 for reporting data breach too late
- What Estonia’s digital ID scheme can teach Europe
- GlobalPlatform Root of Trust
- Introduction to Secure Elements
- Hardware Security Module
- UICC
- SIM, eSIM and Secure Elements
- GSMA IoT SAFE
- New IP
- “Discussion Paper: An Analysis of the ‘New IP’ Proposal to the ITU-T.” Internet Society, 3 June 2020, https://www.internetsociety.org/resources/doc/2020/discussion-paper-an-analysis-of-the-new-ip-proposal-to-the-itu-t/.
Attributions: Michael Maier, Atalanta fugiens, Oppenheim, 1618


 Photo by
  Photo by

 Utopia

 , where:
  is the Pomodoros worked on day
  ,
,  Pomodoros worked on the previous day,
  is white noise (e.g., a Normal distribution) with a zero mean and a standard deviation of 4 (in this case) on day
  the previous day’s noise (see
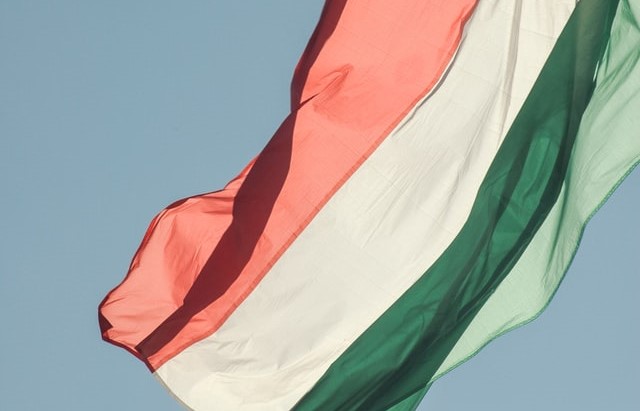
 Egy piros autó (a red car)
 A view of Lake Balaton from Hegymagas, Hungary.


 My first 7 day DuoLingo streak
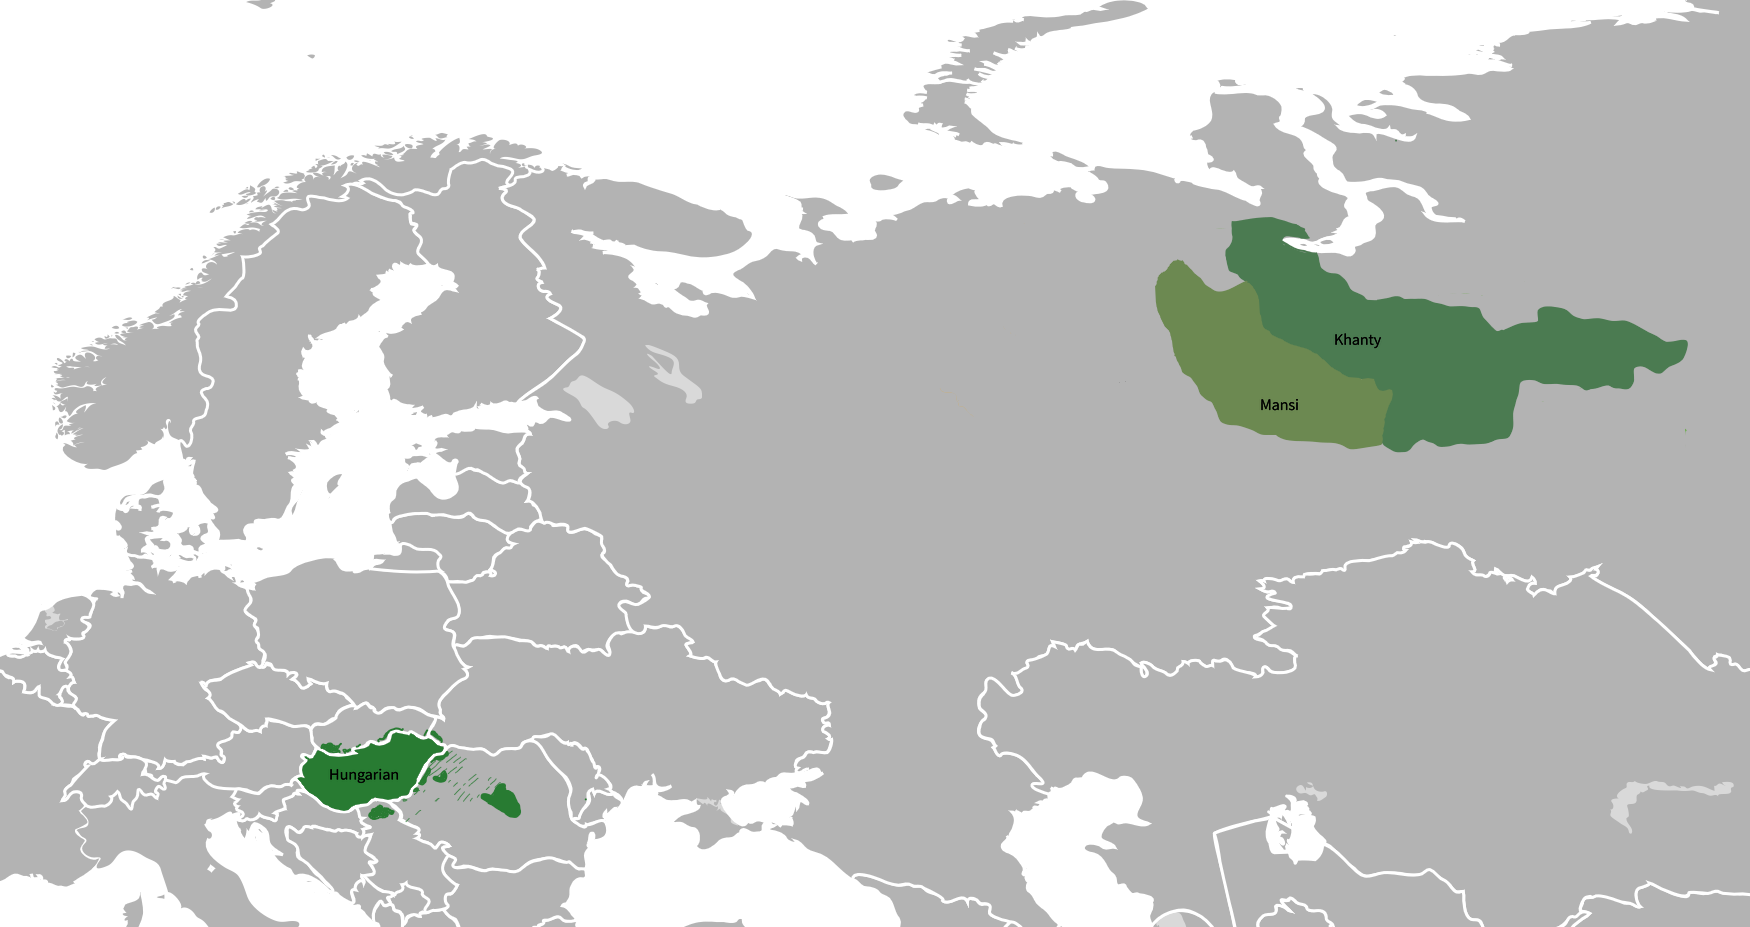 Hungarian and its closest relatives
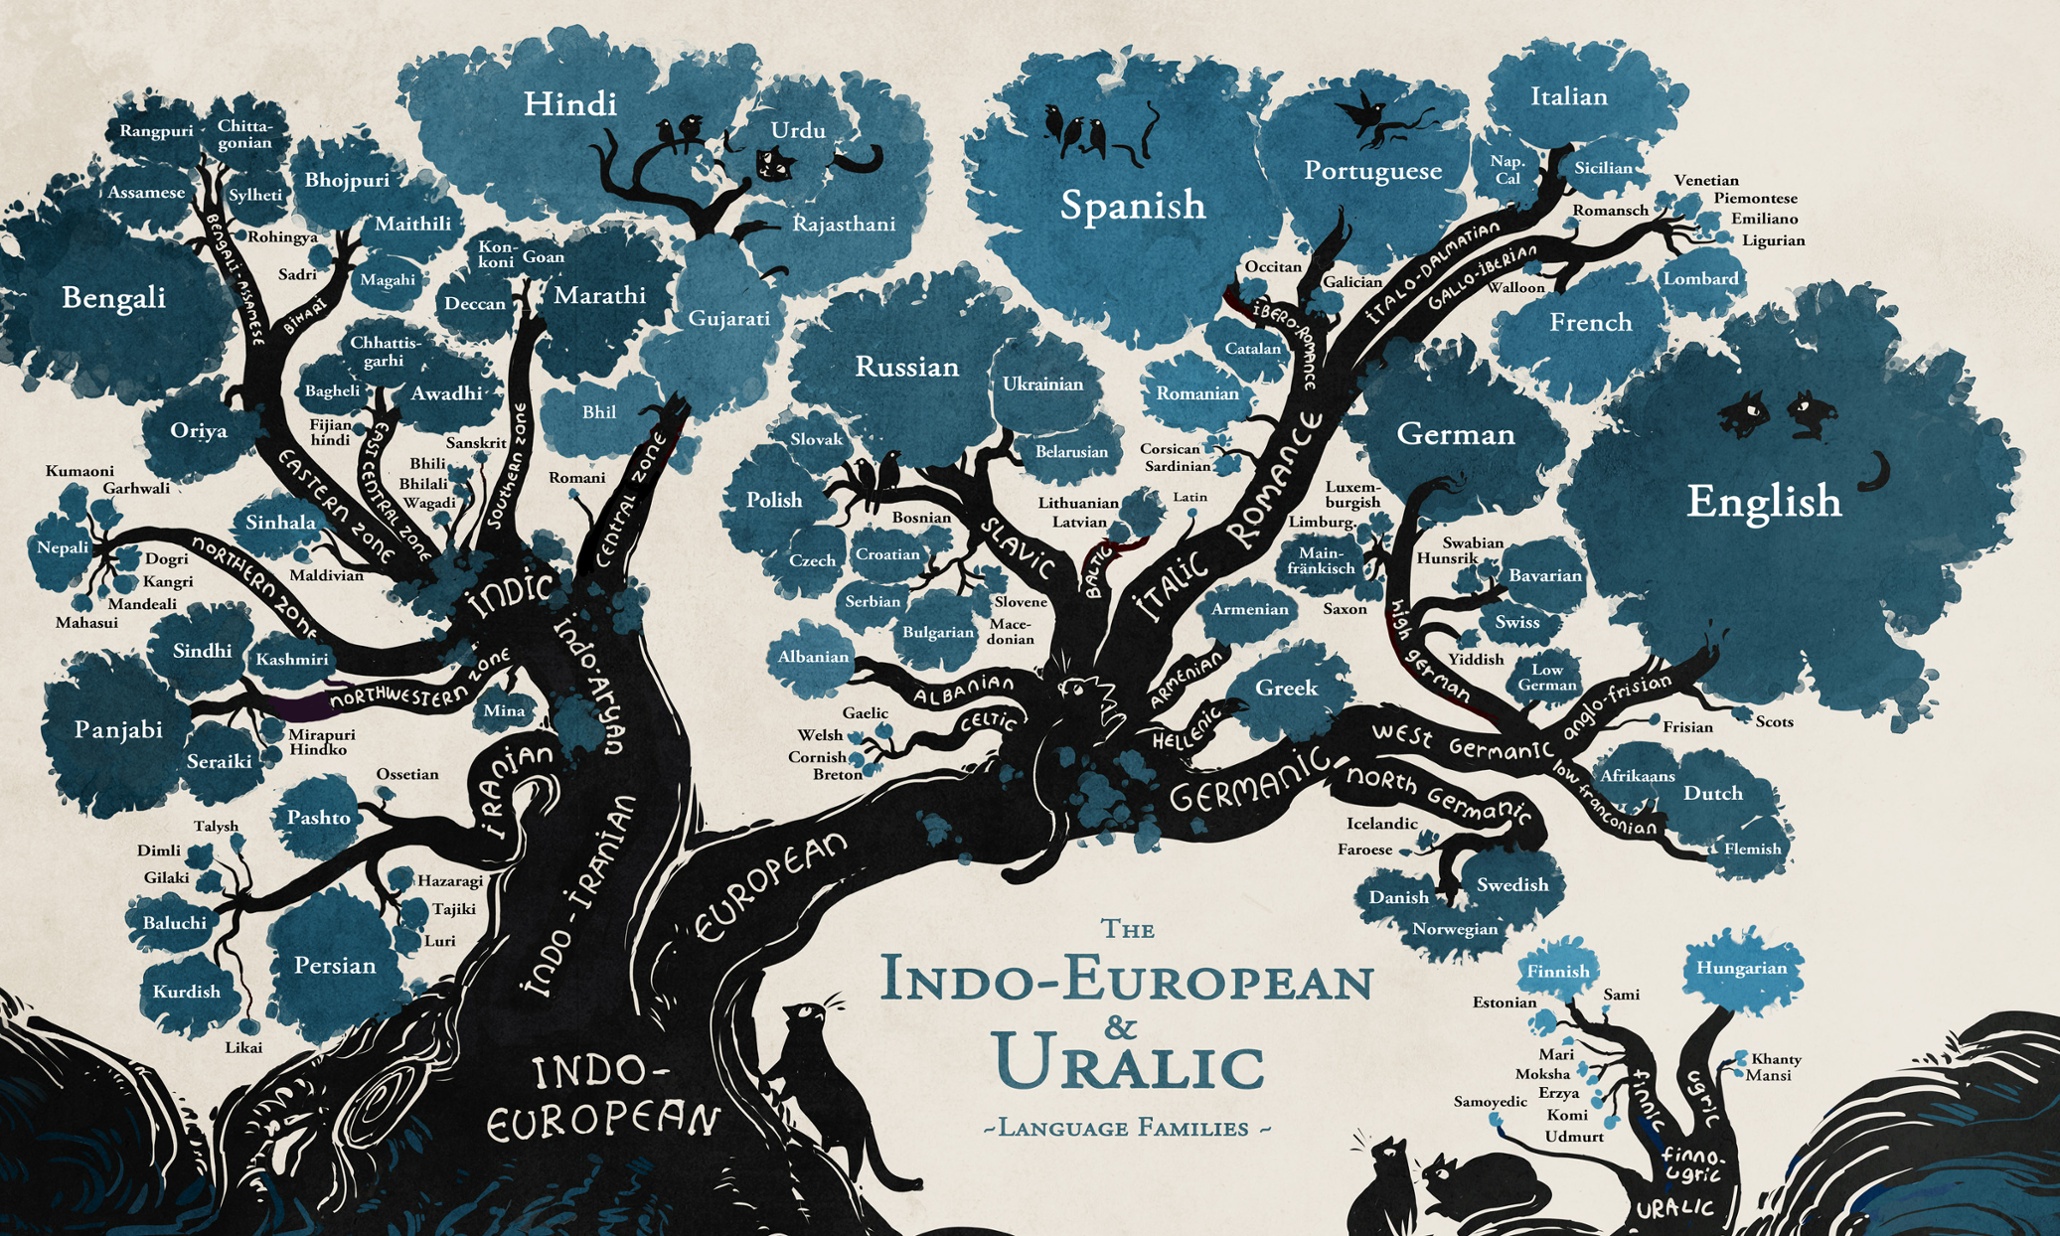 Family tree of the Old World languages, note how Hungarian and Finnish are so far removed from every other European language.
 A couple pages of my Hungarian bullet journal.


 (the standard error on the exponent is
  ), the green line shows
  (
(


